Does your stepper motor skip steps? Or is your stepper motor overheating? Then you probably need to adjust the stepper driver VREF!
Stepper drivers are the electronic components in charge of controlling the stepper motors in your 3d printer. VREF is a reference voltage used by some stepper drivers to adjust the stepper motor current. Increasing the VREF increases the stepper motor current which in turn increases the motor torque but also the temperature.
Stepper motor current setting is for advanced users only. Setting the currents too high can overheat your stepper motors. Make sure you know what you are doing!
- Why adjusting stepper motor currents/VREF on Ender 3?
- Creality 42-34 and 42-40 stepper motor datasheets
- How to know the mainboard version of your Ender 3?
- How to identify the stepper drivers on the Ender 3
- How to calculate VREF on Ender 3
- Trinamic TMC2208, TMC2209, TMC2225 Datasheets
- VREF for Creality stepper motors
- How to check / adjust VREF on Ender 3
Why adjusting stepper motor currents/VREF on Ender 3?
You may need to check or adjust the stepper motor currents/VREF:
- when a stepper motor becomes too hot during printing. A stepper motor is expected to heat up but its temperature should never exceed 80 deg C. If you cannot touch a stepper motor with your hand, the motor current is probably too high and needs to be reduced.
- When a stepper motor does not provide enough torque and skips steps. Increasing motor current increases motor torque and may solve the problem
- when replacing a motor with another type, e.g. replacing the extruder motor with a pancake motor to reduce weight: the current should be adjusted to match the specifications of the new motor.
Creality 42-34 and 42-40 stepper motor datasheets
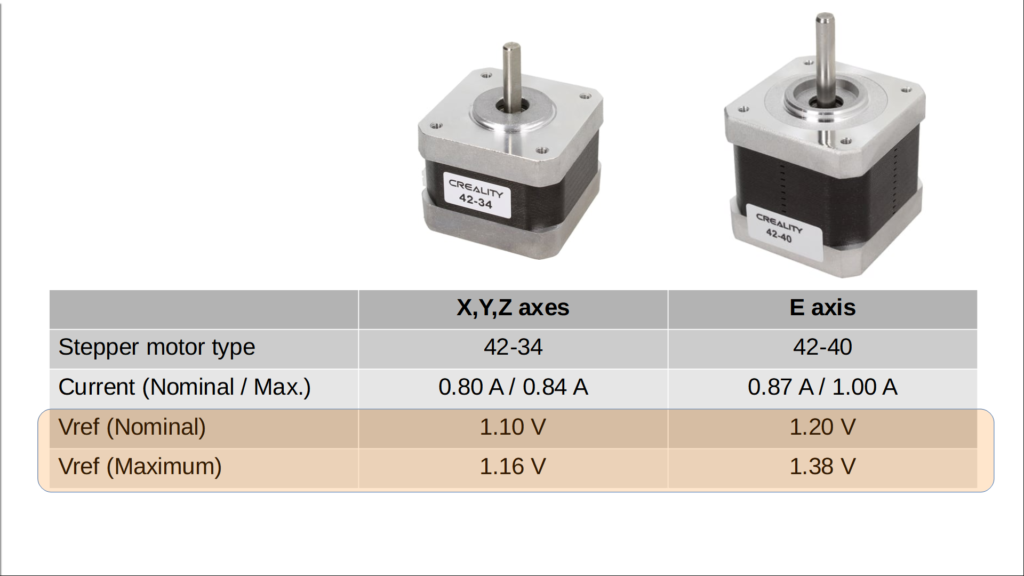
The Ender 3 comes with 2 types of stepper motors: 42-34 motors on the X, Y, Z axis and 42-40 motor on the E axis. The 42-34 motor is smaller, lighter, has less torque and requires less current than the 42-40 motor.
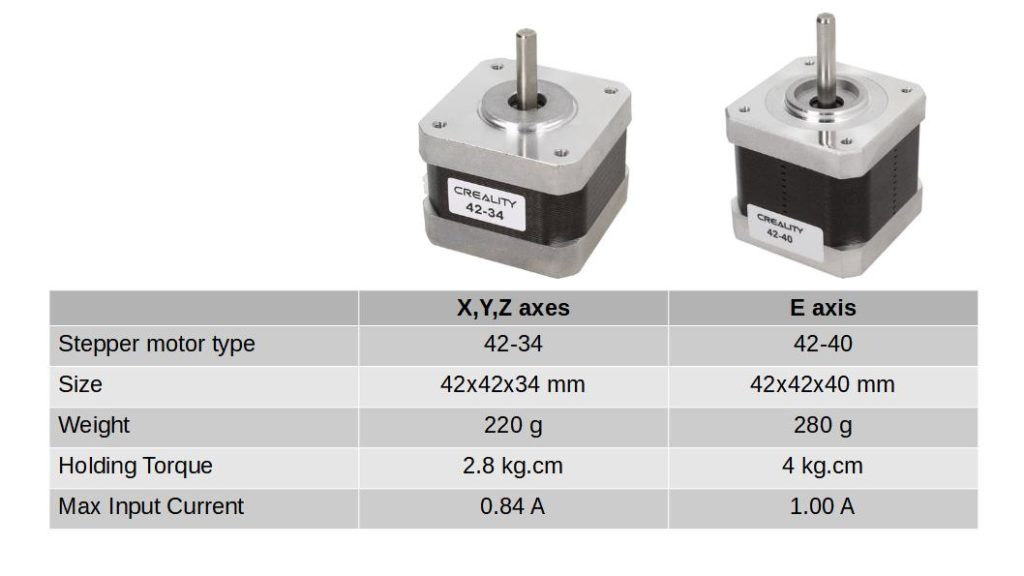
Download Creality 42-34 Stepper Motor Datasheet
Download Creality 42-40 Stepper Motor Datasheet
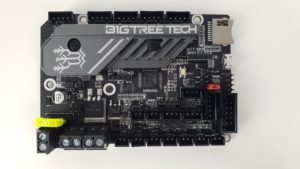
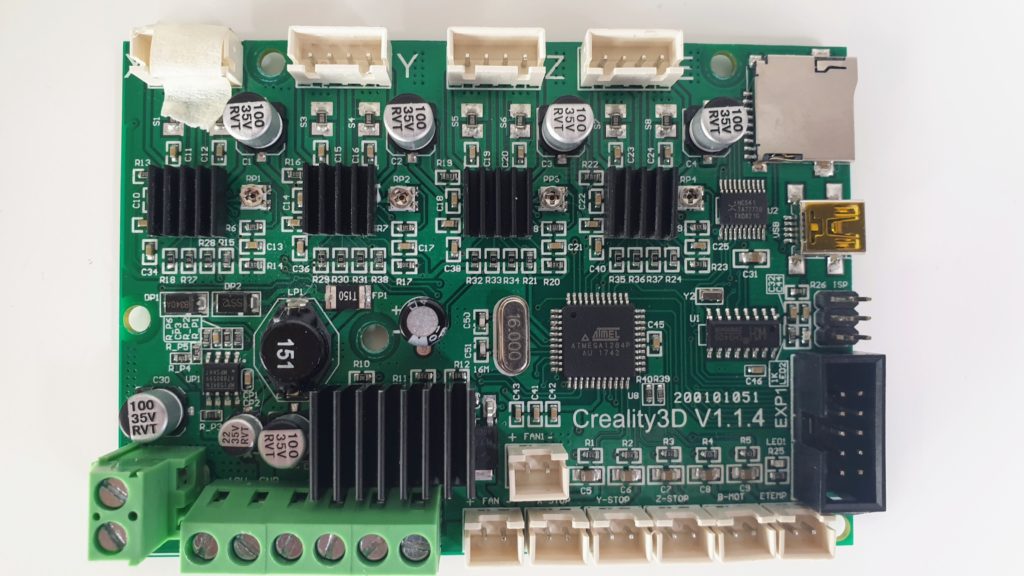
How to know the mainboard version of your Ender 3?
The new Ender 3 Pro and the Ender 3 V2 come with Creality 32 bits silent mainboards, either version 4.2.2 or 4.2.7.
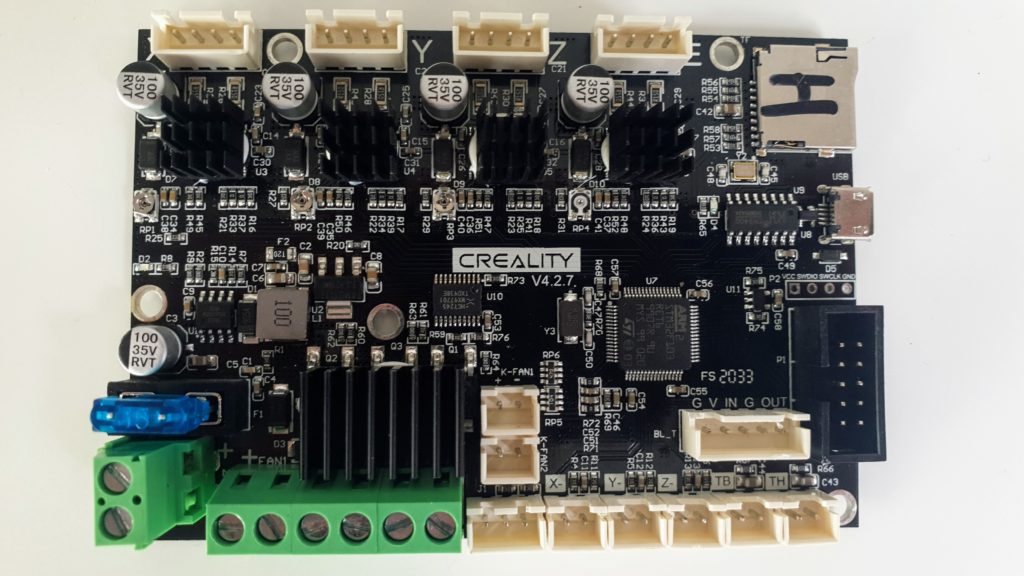
If you have an older Ender 3, you may still have an 8 bits V1 mainboard. In this case, the instructions are not directly applicable to you.
How to identify the stepper drivers on the Ender 3
You can identify which stepper drivers your mainboard uses with the letter on the card reader:
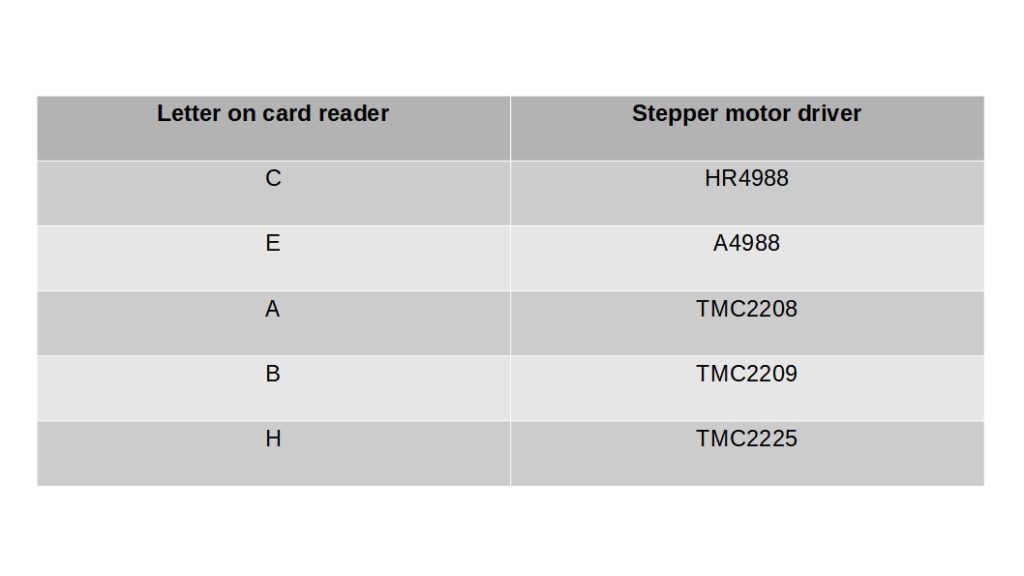
The latest Creality 32 bits mainboards use the TMC2208, 2209 or 2225 drivers in standalone mode.
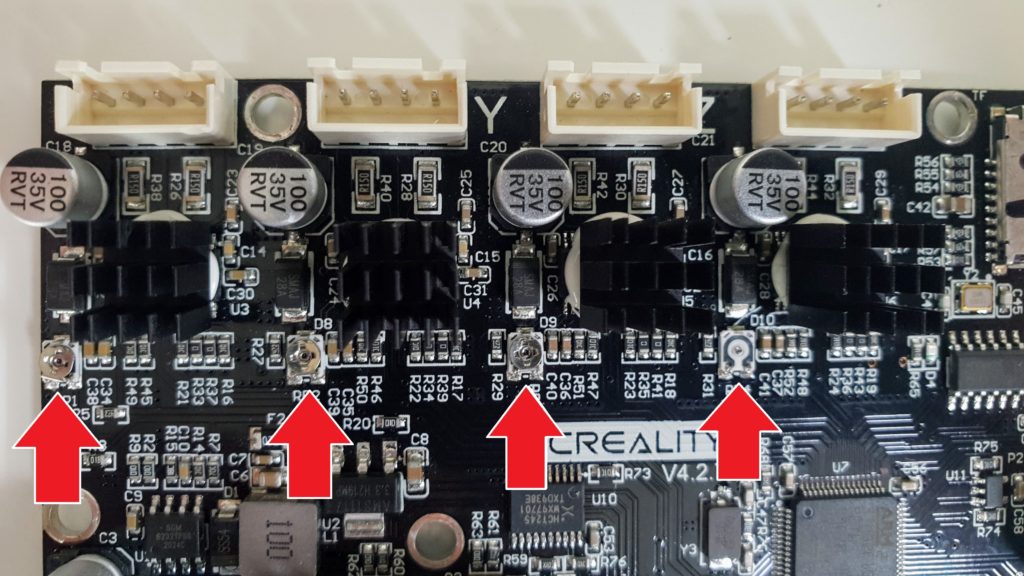
On Creality mainboards, the stepper motor currents are adjusted by turning 4 potentiometers, one for each motor. Each potentiometer adjusts a reference voltage Vref, which is used by the stepper motor driver to adjust the motor current.
How to calculate VREF on Ender 3
The formula is provided in the driver specification. It is the same formula for the TMC2208, TMC2209 and TMC2225 drivers:

IRMS is the root mean squared motor current:
IRMS = IMAX / sqrt(2)
On the Creality mainboards, the sense resistors are 150 mOhms. Plugging these numbers into the driver’s formula, we get:
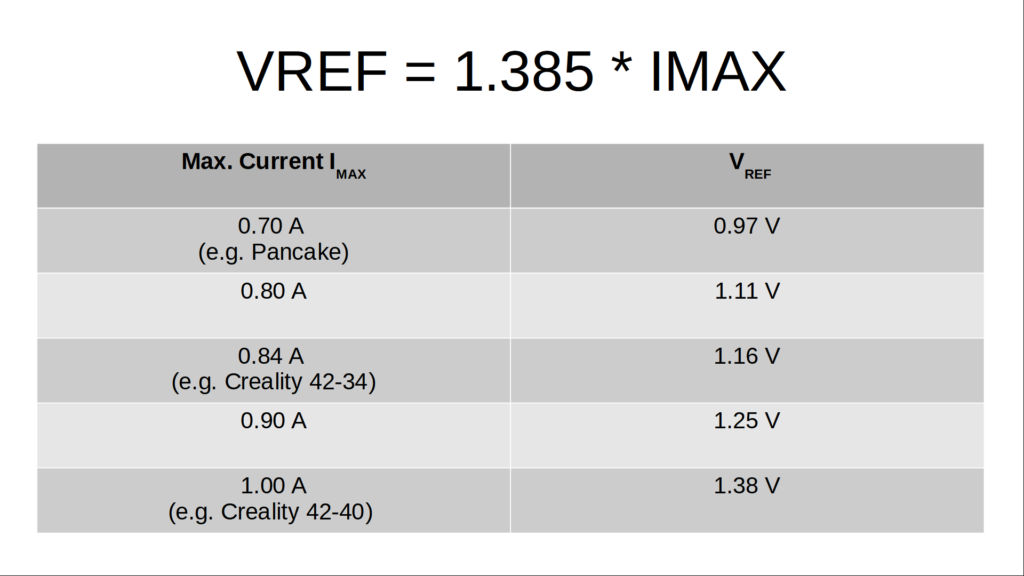
VREF ~=1.385 * IMAX
Trinamic TMC2208, TMC2209, TMC2225 Datasheets
Download TMC220x & TMC2224 family datasheet
VREF for Creality stepper motors
For the Creality 42-34 motor, the max input current is specified as 0.84 Amps. This corresponds to a VREF of 1.16 volts. For the 42-40 motor, the max input current is specified as 1 Amp which corresponds to a VREF of 1.38 volts.
These are the max currents to be used. Lower motor currents can be used and have the benefit of reducing the heat / operating temperature of the stepper motors.
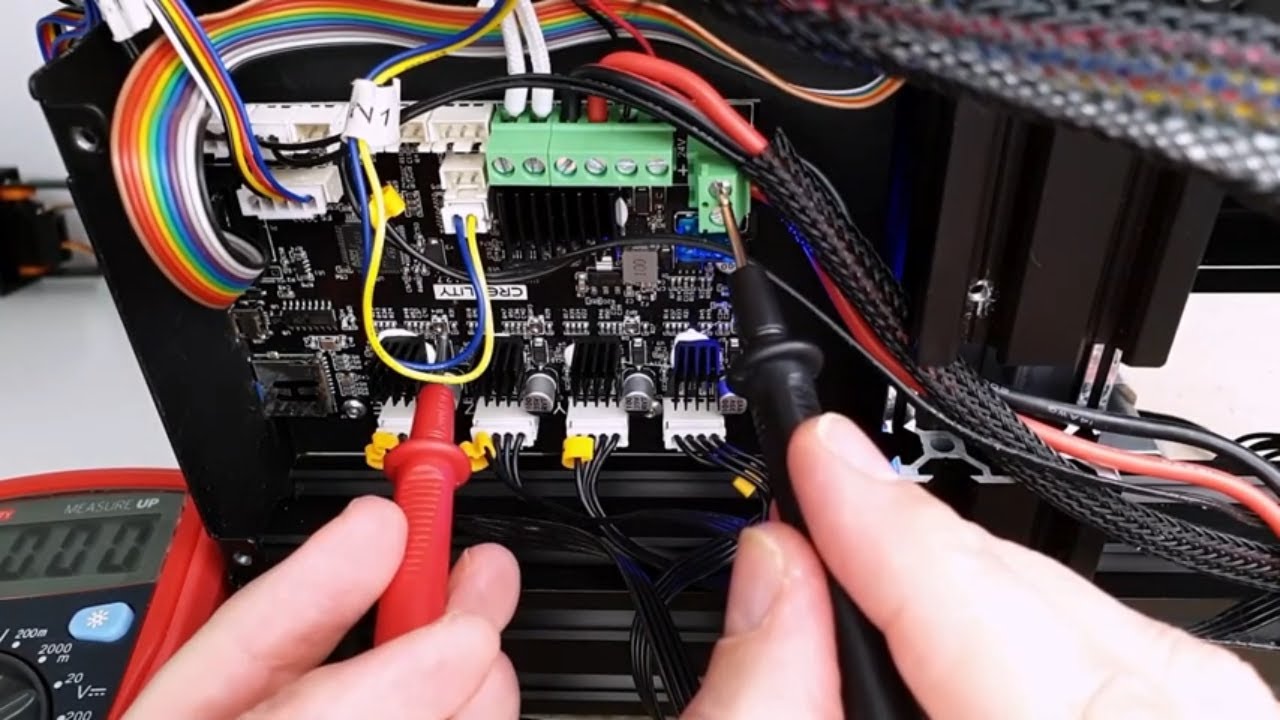
How to check / adjust VREF on Ender 3
In order to adjust the Vrefs, we need a multimeter, a cable with alligator clips at the ends and a small screwdriver:
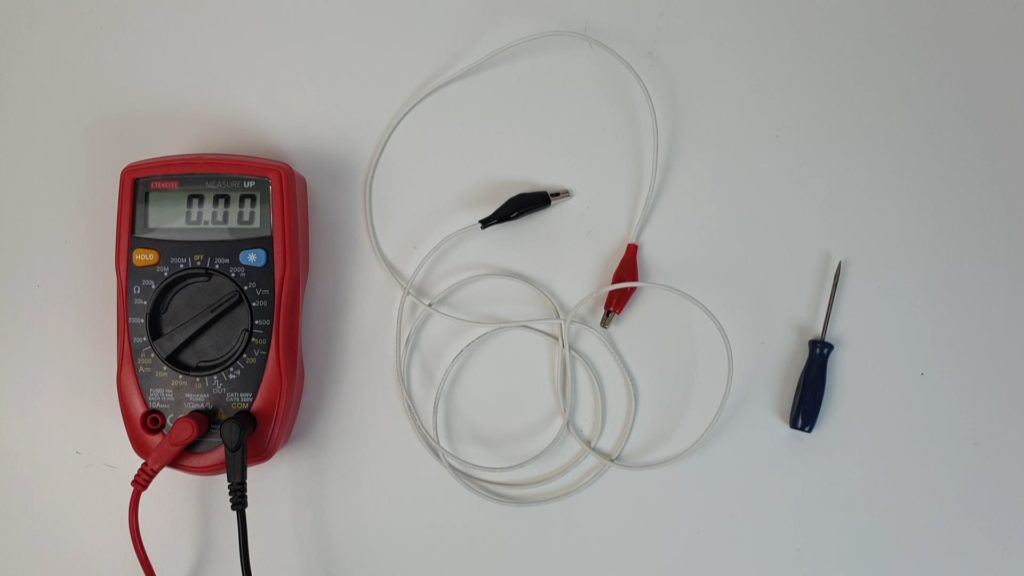
Set the multimeter to volts and adjust the range to measure a voltage between 0 and 2 volts.
Connect one of the alligator clips to the positive terminal of the multimeter and the other to the screwdriver.
To access the mainboard, first remove the bottom cover. There is one screw at the top and 3 screws at the bottom of the printer. You can also disconnect the fan for better access.
First measure and record the current reference voltages: Turn the printer on. Connect the negative terminal of the multimeter to the ground. Touch each potentiometer with the screwdriver. Be careful not to touch anything else!
Expect the X, Y, Z VRefs to be at 1.1 volts and E Vref to be at 1.2 volts.
Turning the potentiometer clockwise increases the current to the stepper motor.
A higher motor current results in more torque but also more heat.
Be careful not to set currents higher than the maximum current that the motor can accept.