
Step by step guide to install the SKR Mini E3 V3 with Klipper on your 3d printer! Hardware, firmware compilation, configuration files, all you need to install Klipper on your SKR Mini E3 V3.0 in one place, fully tested and validated! Enjoy! You’re welcome.
- Why use the SKR Mini E3 V3 to run Klipper?
- What You Need
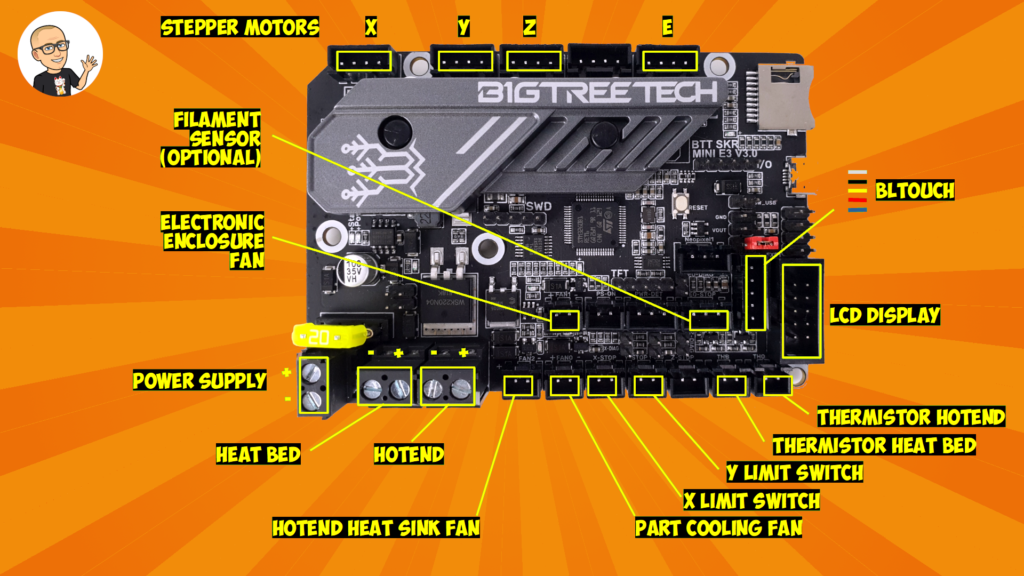
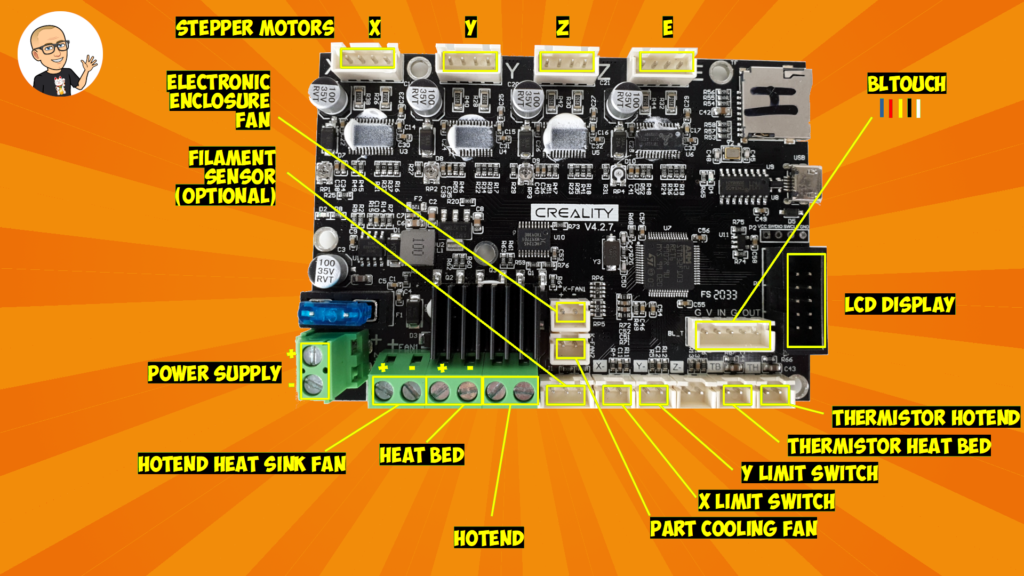
- SKR Mini E3 V3 Pinout / Wiring diagram
- Hardware installation for Klipper
- Configure the Raspberry Pi to run Klipper
- Install Klipper on the SKR Mini E3 V3
- Configure Klipper for the SKR Mini E3 V3
- Advanced Klipper Settings for the SKR Mini E3 V3
- Prefer to not specify a hold_current
- TMC interpolate setting introduces small position deviation
Why use the SKR Mini E3 V3 to run Klipper?
The SKR Mini E3 V3 provides several benefits over the stock mainboards to run Klipper:
- very good heat dissipation thanks to the upgraded heat sink and a better separation of the drivers
- silent TMC2209 drivers and 3 PWM Controlled fans
- UART controlled TMC drivers which allows the firmware to control the stepper motor mode & current and to monitor the drivers. No need to adjust the VREFs using a screwdriver, everything is controlled by software!
- Support for expansion: Touch screen, filament runout detection, BLTouch + dual Z-axis (running of a single driver)
- can run the stepper motors in spreadCycle mode instead of stealthChop mode (faster & more accurate positioning, no skipped steps)
- can use Klipper pressure advance & Marlin linear advance => Much better retraction quality : Marlin linear advance is incompatible with TMC drivers standalone mode used by the stock Creality mainboards
What You Need
| BIGTREETECH SKR Mini E3 V3.0 | 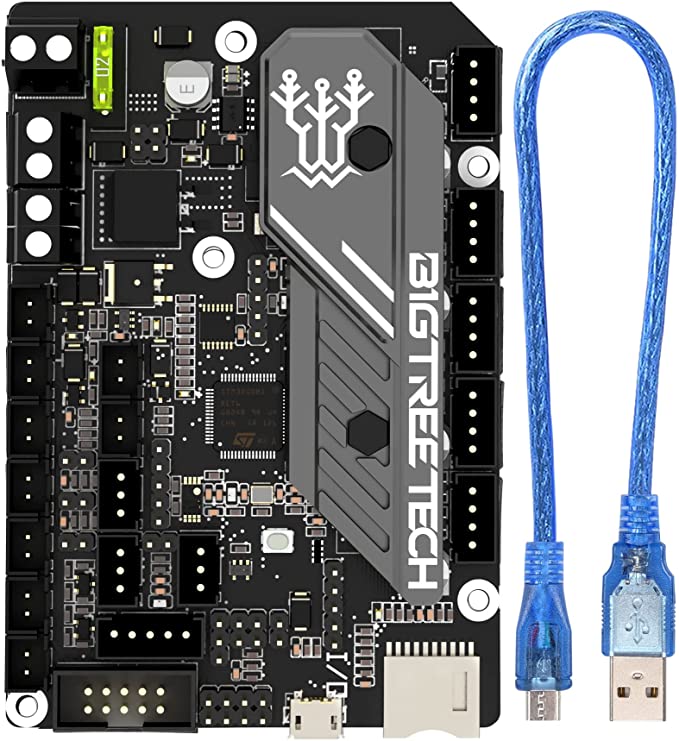 |
| Raspberry Pi 4 Model B | 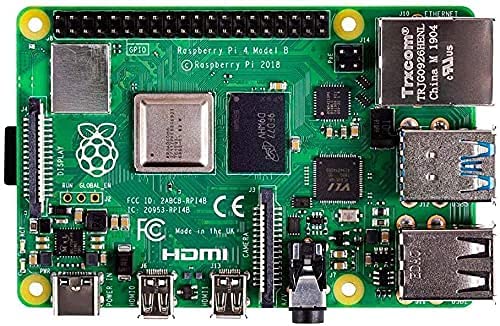 |
| 64GB Micro SD Card |  |
| Short USB A to Micro USB B Cable (30 cm or 1 foot) | 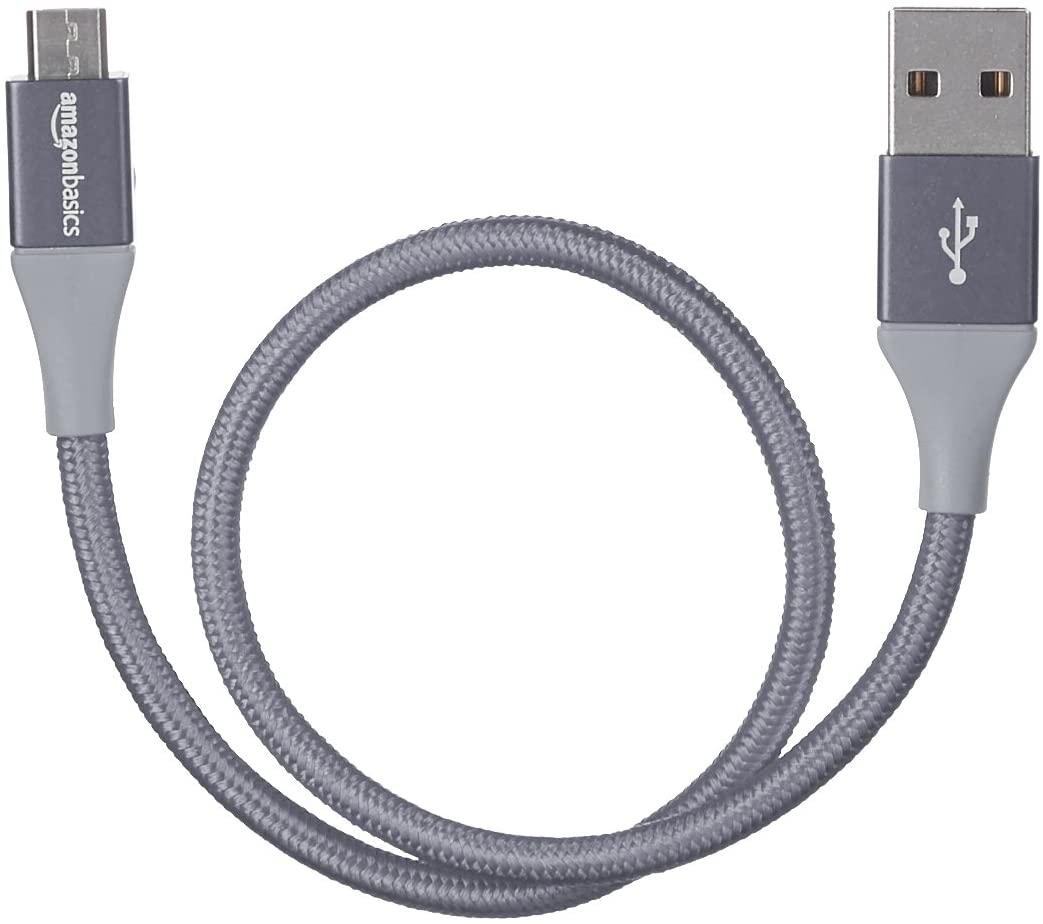 |
| Waveshare 4inch HDMI LCD Optional: If you want a small LCD touch screen to control your printer with KlipperScreen This touch screen from Waveshare is nice because it can be plugged directly on top of the Raspberry Pi 4 and doesn’t need a separate power supply. See here for more information | 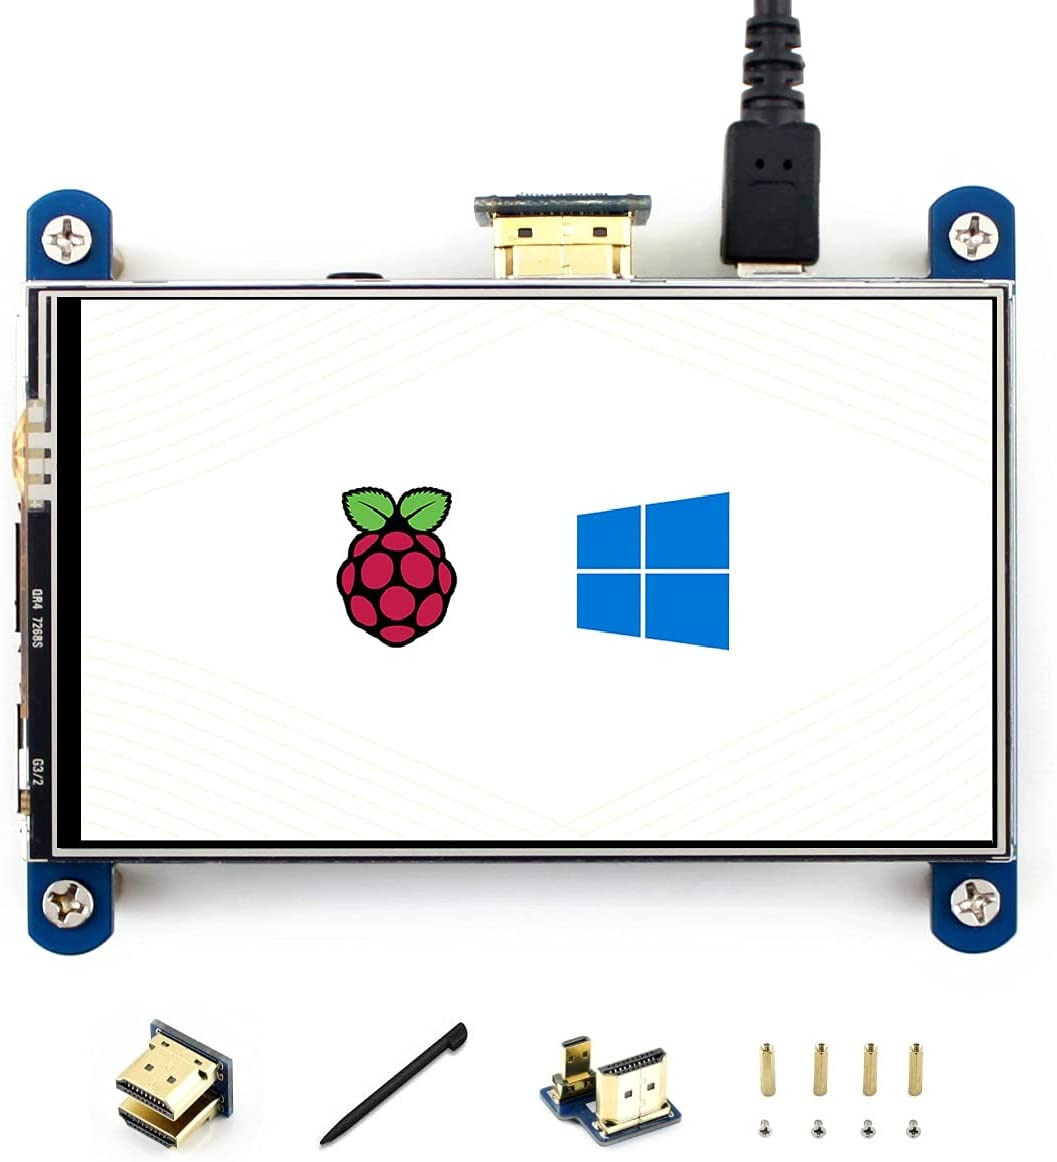 |
| ADXL345 Triple-Axis Accelerometer Optional: If you want to tune input shaping | 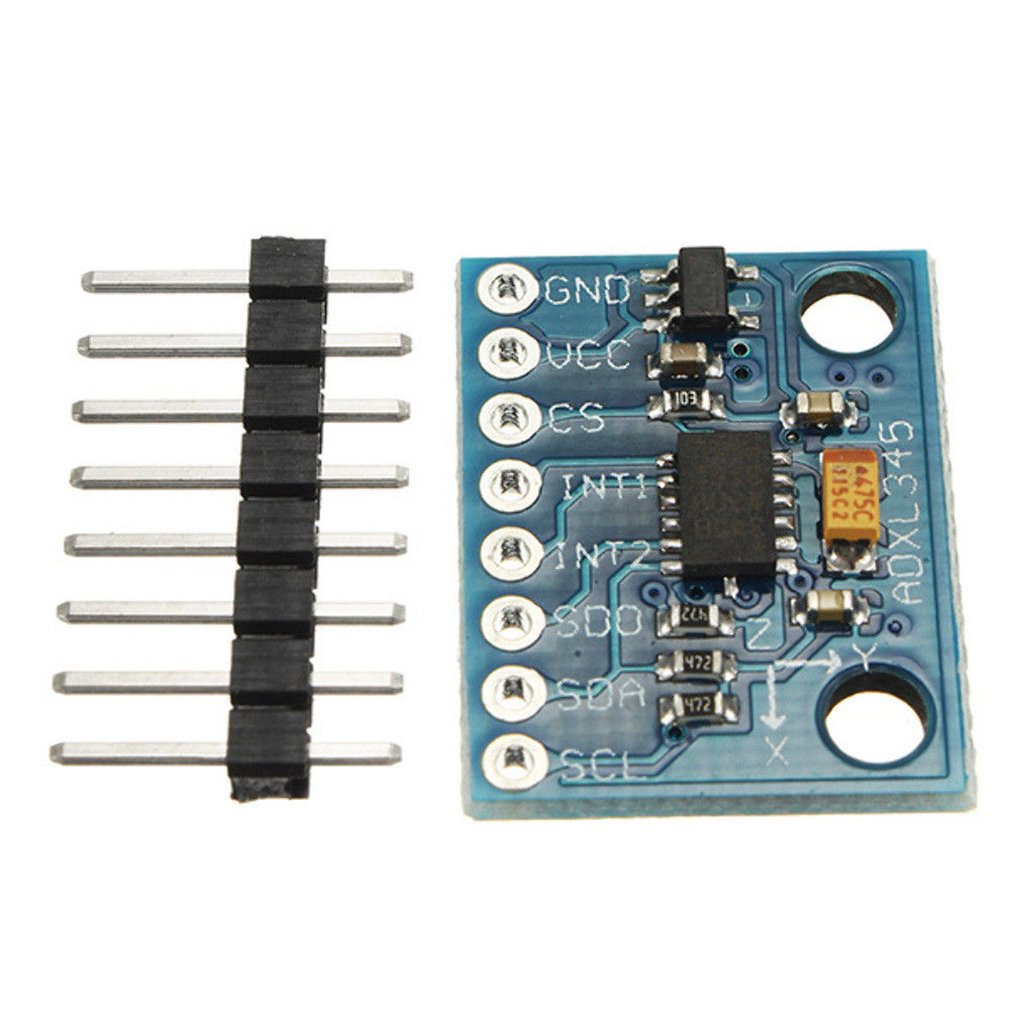 |
| Raspberry Pi camera Optional: If you want to monitor your 3d printer remotely |  |
| Raspberry Pi camera extension cable 1 meter Optional: If you want to connect a Raspberry Pi camera to the Pi | 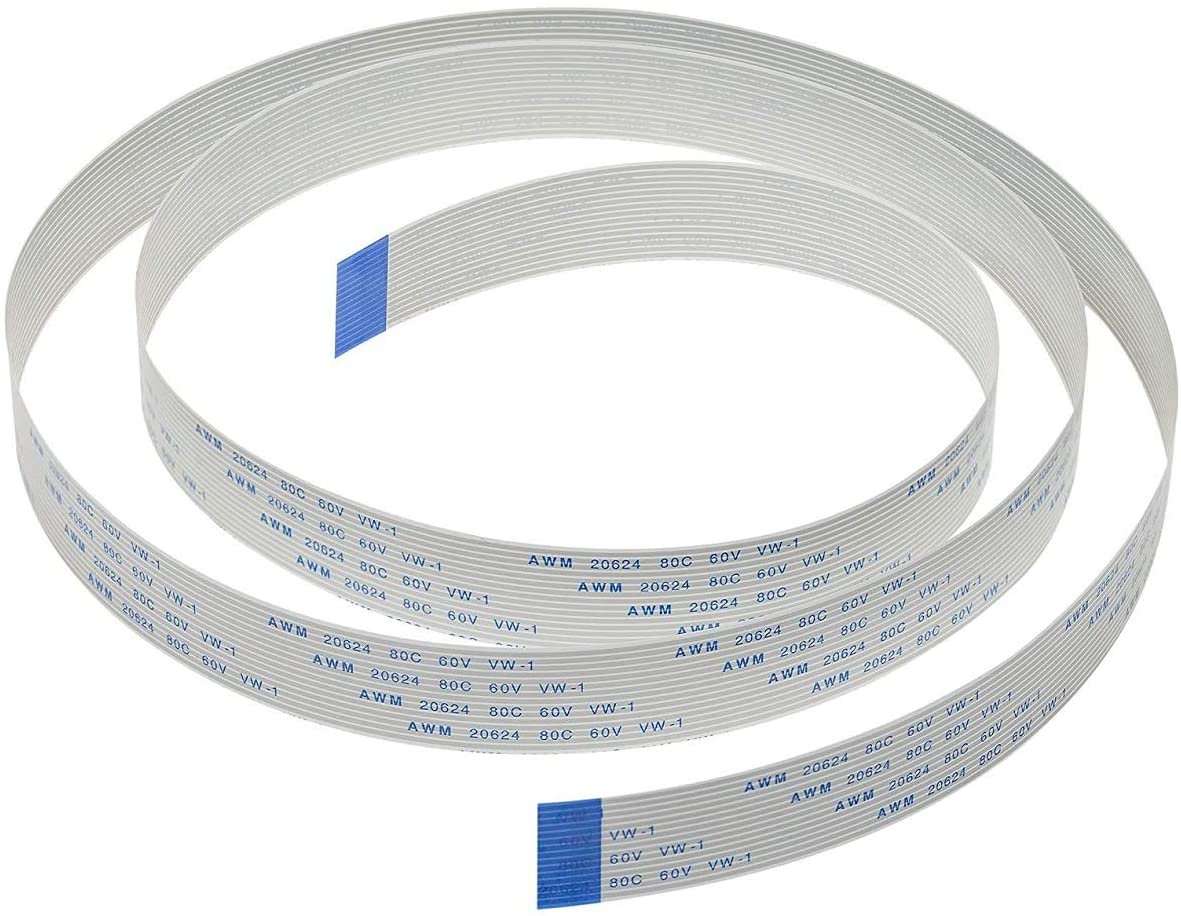 |
| LM2596S DC-DC Buck Regulator Power Module Optional: If you want to power the Raspberry Pi (5V) directly from the printer power supply (12V or 24V) | 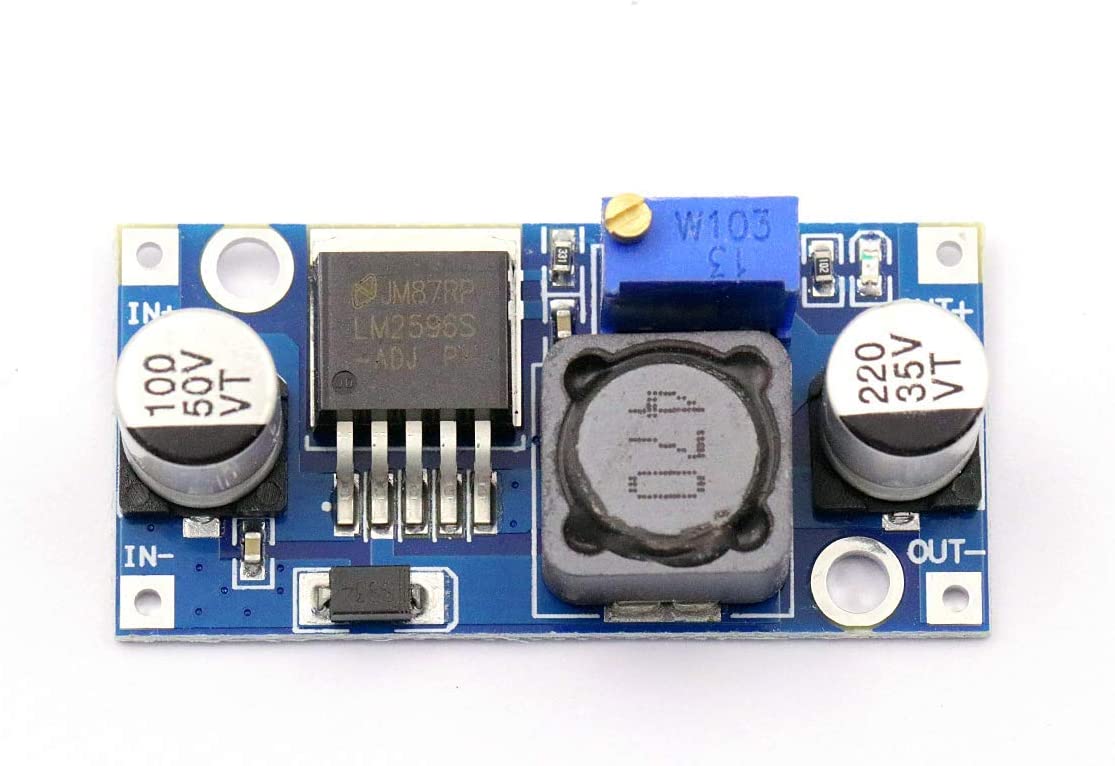 |
| Dupont Ratchet Crimping Tool Set | 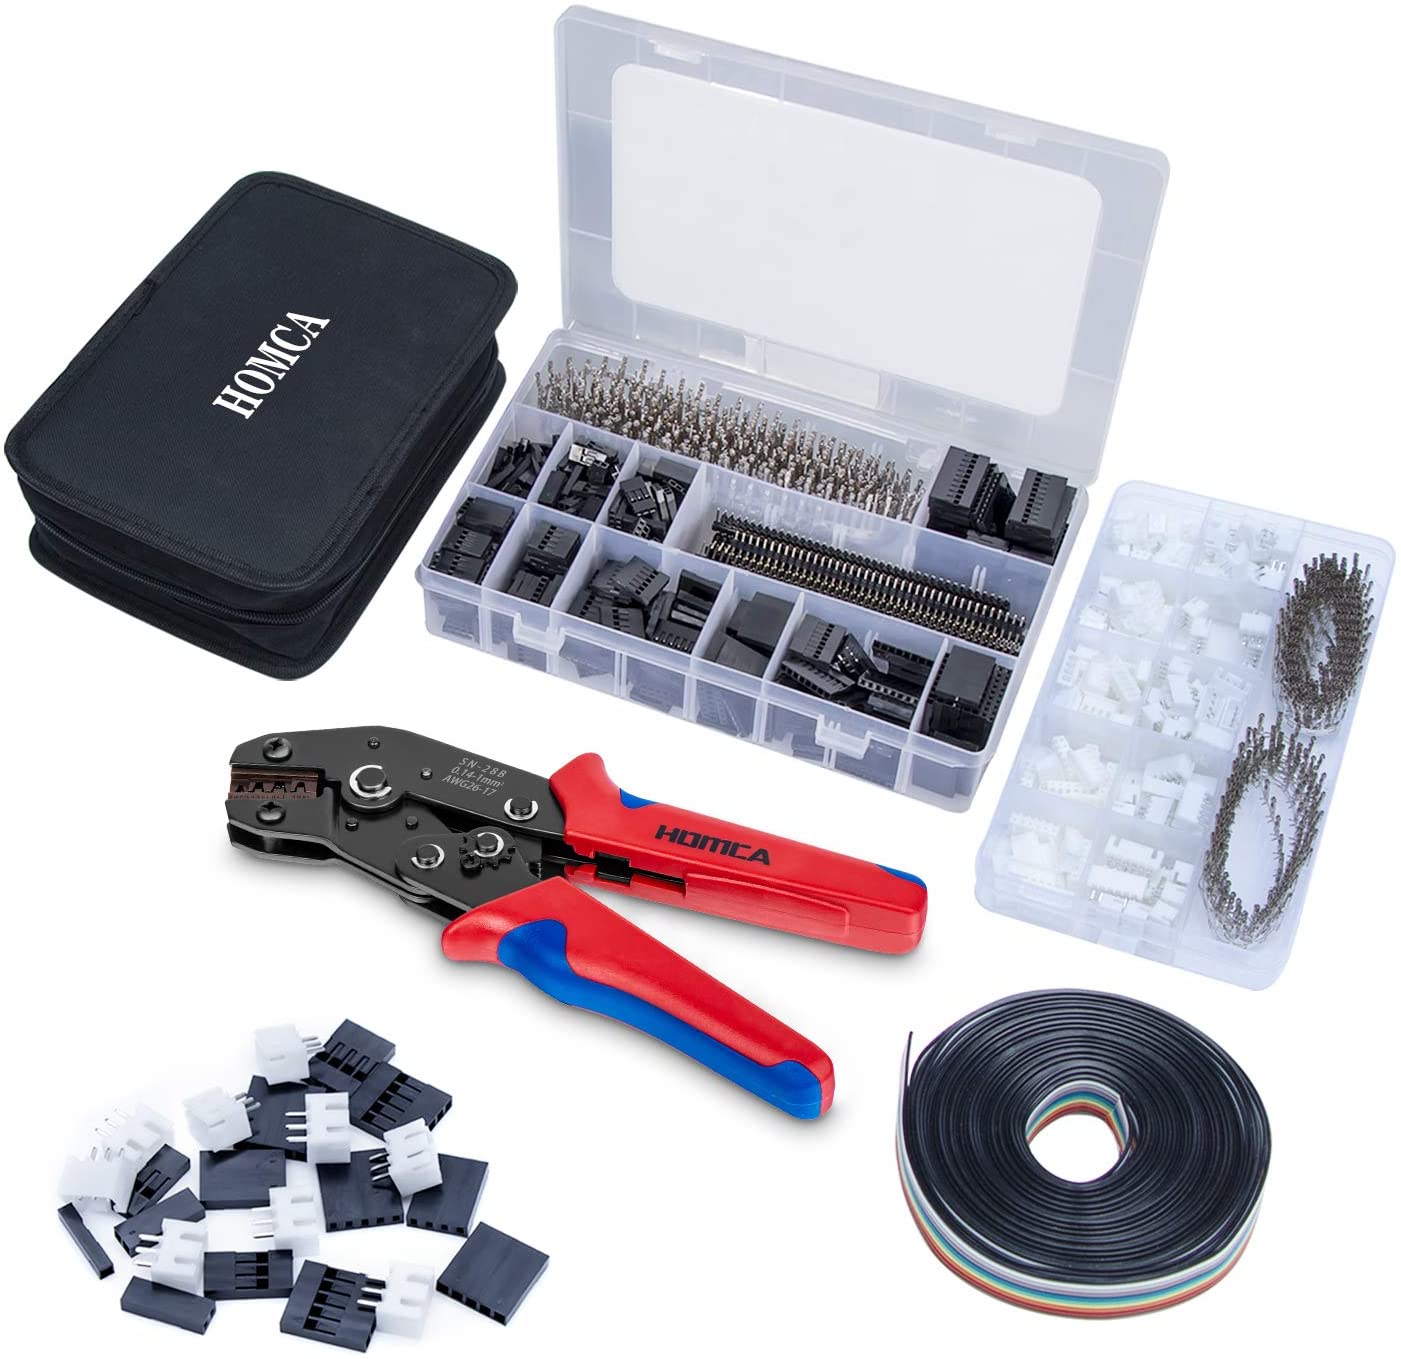 |
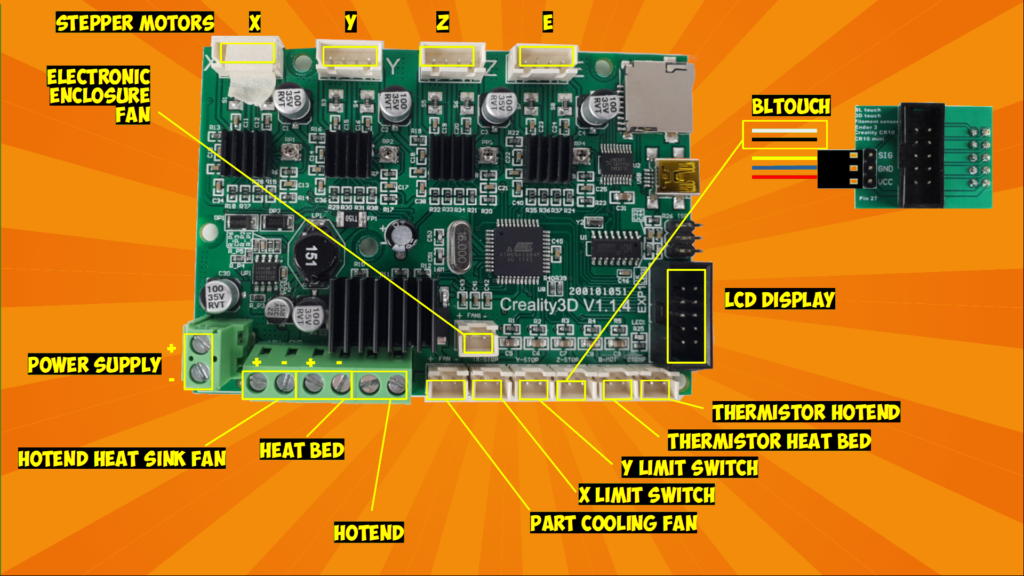
SKR Mini E3 V3 Pinout / Wiring diagram
The SKR Mini E3 V3.0 is almost a direct replacement of the Ender 3 mainboards. It has the same physical size & mounting holes. The only differences are:
- The polarity +/- of some connectors (e.g. HEAT BED, HOTEND) is reversed
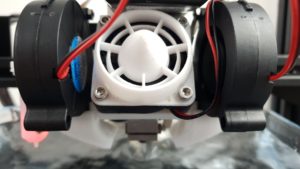
- The HOTEND HEAT SINK FAN requires a JST 2 pins connector (in the Creality mainboards, it is connected directly, without a connector)
Hardware installation for Klipper
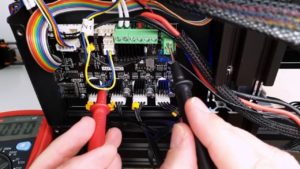
To install & connect everything for Klipper, please refer to the video below (e.g. Ender 3 Pro). You need a Raspberry Pi 3 or 4, connected to the SKR Mini E3 with an USB cable. Optionally, you can power the Raspberry Pi directly from the power supply of the 3D printer by using a Y-splitter cable and an LM2596S DC DC regulator to lower the voltage from 12V/24V to 5V. You also might want to use some 3d printed parts to make a clean install: See section “3D printed parts to install Klipper on your Ender 3” on this page. Finally, you might want to install an LCD touch screen to control your 3d printer with KlipperScreen.
Configure the Raspberry Pi to run Klipper
You need to setup the Raspberry Pi to run Klipper. Again, please refer to the video above. The easiest way to get started with Klipper is to use a Raspberry Pi image like MainsailOS or FluiddPI. Download FluiddPI from GitHub.
Write the image to an SD card, using Raspberry Pi imager. Before clicking on WRITE, press CTRL+SHIFT+X to configure advanced options (e.g. Wifi credentials).
Insert the SD Card into your Raspberry Pi and turn it on.
Connect to the Raspberry Pi web interface using the hostname you set when you wrote the image (e.g. http://ender3). This gives you access to the Fluidd web interface for Klipper. Don’t worry about the “Unable to open config file” error message: we will fix this shortly.
Install Klipper on the SKR Mini E3 V3
To use Klipper on your SKR Mini E3 V3, you will need to compile and flash the Klipper micro-controller code as per BigTreeTech instructions.
To compile the micro-controller code for the 3d printer mainboard, connect to the Raspberry Pi with ssh.
Open the Klipper Firmware Configuration tool.
pi@ender3:~ $ cd ~/klipper
pi@ender3:~ $ make menuconfig
Select STM32 for the Micro-controller architecture, STM32G0B1 for the processor model, a 8KiB bootloader, and the USB communication interface.
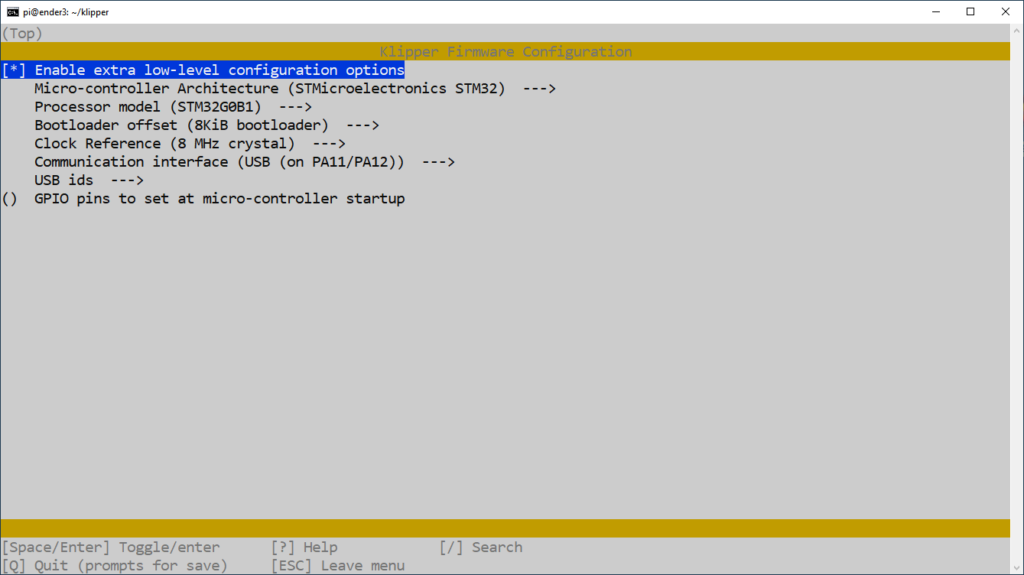
Now exit (type Q), save the configuration (type Y) and compile the firmware by typing:
pi@ender3:~ $ makeThis creates a klipper.bin file in the klipper/out directory. You can now copy this file to an SD card by running SCP on a Windows or Linux computer running on the same network as the Raspberry Pi. Rename the file to “firmware.bin” (e.g. H: is the SD Card drive):
scp pi@ender3:~/klipper/out/klipper.bin H:\firmware.binNote that the SKR Mini E3 only allows the flashing of a file named “firmware.bin”.
Insert the SD card into the SKR Mini E3 and turn it on to flash the firmware.
Now connect the Raspberry PI to the printer using a Micro USB B to USB cable.
You can confirm that the flash was successful, by running ls /dev/serial/by-id. if the flash was successful, this should now show a Klipper device, similar to:
pi@ender3:~ $ ls /dev/serial/by-id
usb-Klipper_stm32g0b1xx_27000D000150414235363020-if00
Save this information for later as it will be needed when updating printer.cfg
This completes the setup on the 3d printer/SKR Mini E3 V3 side. The next step is to update the Klipper configuration files on the Raspberry Pi for the SKR Mini E3 V3 / 3d printer.
Configure Klipper for the SKR Mini E3 V3
You can download my Klipper configuration files for the SKR Mini E3 V3 on GitHub.
This should give you a good starting point to make your own config (it’s often easier to modify something than to start from scratch!)
The first thing to do is to update the [mcu] section of printer.cfg with the serial port name. You can get the serial port name by running ls /dev/serial/by-id on the Raspberry Pi:
[mcu]
serial: /dev/serial/by-id/usb-Klipper_stm32g0b1xx_27000D000150414235363020-if00
# restart_method: command
To get the fans working properly in Klipper, connect the fans as per the pinout section above and update printer.cfg as shown below:
- The Part Cooling Fan (FAN0/PC6) is controlled by the slicer / gcode commands. Add a [fan] section to printer.cfg:
[fan]
pin: PC6- Configure the Hotend Heat Sink Fan (FAN2/PB15) to turn on at full speed when the hotend is above 50 deg C. Add a [heater_fan] section in printer.cfg:
[heater_fan hotend_fan]
pin: PB15
heater: extruder
heater_temp: 50.0- Configure the Electronic Enclosure Fan (FAN1/PC7) to turn on automatically whenever any driver is enabled and to turn off (or reduce to idle speed) 60 seconds after drivers are turned off. Add a [controller_fan] section in printer.cfg:
[controller_fan electronic_enclosure_fan]
pin: PC7
idle_timeout: 60
If you want to keep using your stock ST7920 LCD (Ender 3 Pro/CR10) with the SKR MINI E3 V3, add a [display] section in your printer.cfg configuration file:
[display]
lcd_type: st7920
cs_pin: PB8
sclk_pin: PB9
sid_pin: PD6
encoder_pins: ^PA10, ^PA9
click_pin: ^!PA15

[output_pin beeper]
pin: PB5
To add a BLTouch to the SKR Mini E3 V3, add a [bltouch] section to printer.cfg:
[bltouch]
sensor_pin: ^PC14
control_pin: PA1
x_offset: -36
y_offset: 0
z_offset: 2.00
You will need to update x_offset, y_offset, and z_offset to match the offsets of your current setup. You can also define a [safe_z_home] section to home toward the center of the print area:
[safe_z_home]
home_xy_position: 151,115   # Nozzle coordinates
speed: 250
z_hop: 10
z_hop_speed: 5
To use the probe in place of the z endstop, set the stepper_z endstop_pin to “probe:z_virtual_endstop”:
[stepper_z]
step_pin: PB5
dir_pin: !PB6
enable_pin: !PC3
microsteps: 16
rotation_distance: 8
endstop_pin: probe:z_virtual_endstop
#position_endstop: 0.0
position_min: -4
position_max: 250
The stepper motor and their currents can be configured in printer.cfg. For my setup (BondTech BMG/E3D V6), I have:
[stepper_x]
step_pin: PB13
dir_pin: !PB12
enable_pin: !PB14
microsteps: 64
rotation_distance: 40
endstop_pin: ^PC0
position_endstop: 0
position_min: 0
position_max: 230
homing_speed: 50

[tmc2209 stepper_x]
uart_pin: PC11
tx_pin: PC10
uart_address: 0
run_current: 0.580
interpolate: False
stealthchop_threshold: 0

[stepper_y]
step_pin: PB10
dir_pin: !PB2
enable_pin: !PB11
microsteps: 64
rotation_distance: 40
endstop_pin: ^PC1
position_endstop: -12
position_min: -12
position_max: 230
homing_speed: 50

[tmc2209 stepper_y]
uart_pin: PC11
tx_pin: PC10
uart_address: 2
run_current: 0.580
interpolate: False
stealthchop_threshold: 0

[stepper_z]
step_pin: PB0
dir_pin: PC5
enable_pin: !PB1
microsteps: 64
rotation_distance: 8
# endstop_pin: ^PC2
# position_endstop: 0.0
endstop_pin: probe:z_virtual_endstop
position_min: -4
position_max: 250

[tmc2209 stepper_z]
uart_pin: PC11
tx_pin: PC10
uart_address: 1
run_current: 0.580
interpolate: False
stealthchop_threshold: 0

[extruder]
step_pin: PB3
dir_pin: !PB4
enable_pin: !PD1
microsteps: 64
rotation_distance: 7.71
nozzle_diameter: 0.400
filament_diameter: 1.750
max_extrude_only_distance: 100
pressure_advance: 0.04
pressure_advance_smooth_time: 0.040

heater_pin: PC8
sensor_type: ATC Semitec 104GT-2
sensor_pin: PA0
control: pid
pid_Kp: 21.527
pid_Ki: 1.063
pid_Kd: 108.982
min_temp: 0
max_temp: 300

[tmc2209 extruder]
uart_pin: PC11
tx_pin: PC10
uart_address: 3
run_current: 0.580
interpolate: False
stealthchop_threshold: 0
Advanced Klipper Settings for the SKR Mini E3 V3
It is recommended to always use “spreadCycle” mode (by not specifying
stealthchop_threshold) or to always use “stealthChop” mode (by settingstealthchop_thresholdto 999999)In general, spreadCycle mode provides greater torque and greater positional accuracy than stealthChop mode. However, stealthChop mode may produce significantly lower audible noise on some printers.
In addition, the Klipper documentation recommends to not specify a hold current and to disable interpolation:
Prefer to not specify a hold_current
If one configures a
hold_currentthen the TMC driver can reduce current to the stepper motor when it detects that the stepper is not moving. However, changing motor current may itself introduce motor movement.
TMC interpolate setting introduces small position deviation
The TMC driver
interpolatesetting may reduce the audible noise of printer movement at the cost of introducing a small systemic positional error.
In the [tmc2209 stepper_x], [tmc2209 stepper_y], [tmc2209 stepper_z] and [tmc2209extruder] sections of printer.cfg, delete the “hold_current” lines, add “interpolate: False” and “stealthchop_threshold: 0”, and increase microsteps from 16 to 64 or 128.