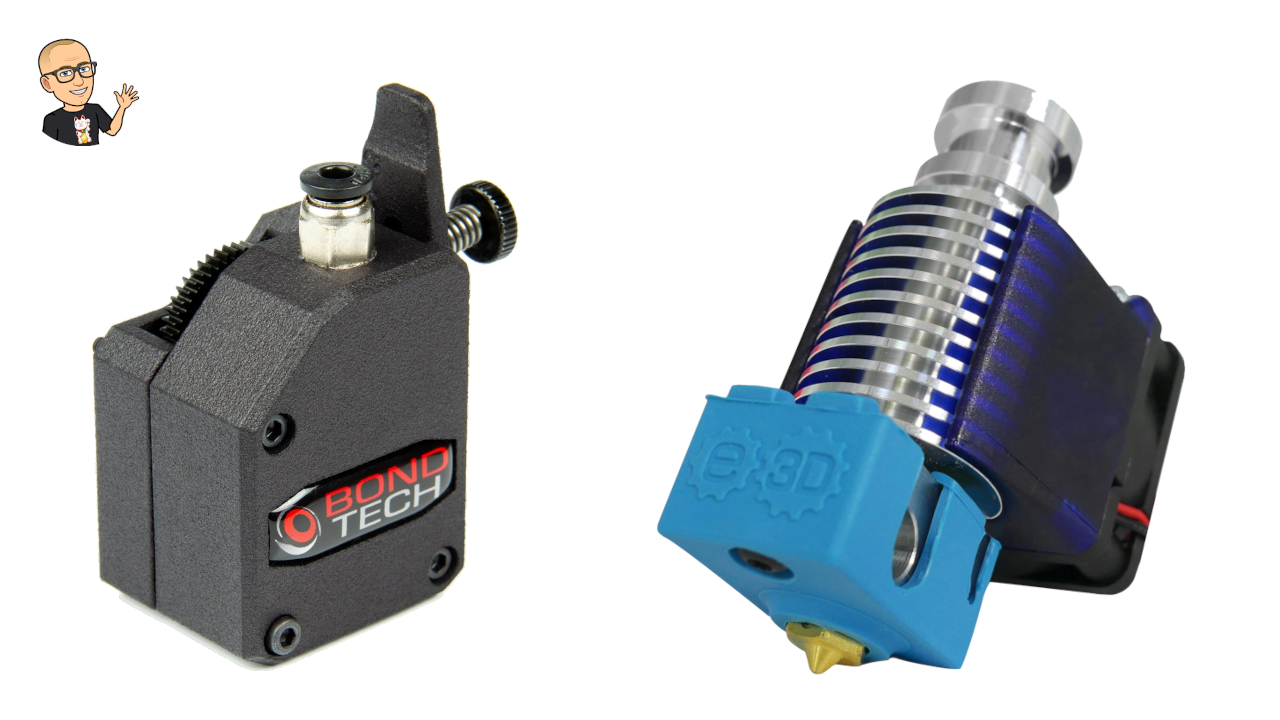
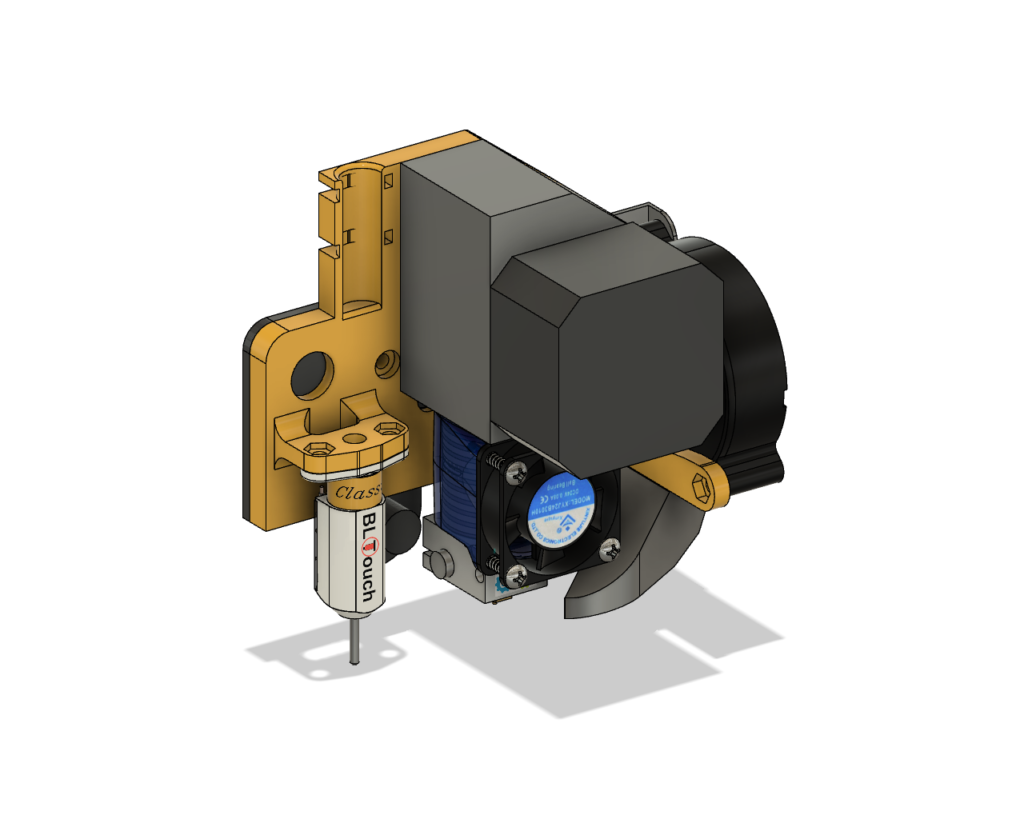
Looking for a 3d printer upgrade that really improves print quality and reliability? I upgraded my Ender 3 Pro to direct drive using some of the best components available for 3d printing: The BondTech BMG extruder and the E3D V6 hotend.
The extruder and the hotend are probably some of the most important components of the 3d printer. Together they ensure accurate and reliable extrusion. That’s why it’s so important to get quality parts.
Why the BondTech BMG?
The ungeared extruder supplied with the Ender 3 is not bad but is not always able to deliver enough torque to ensure reliable extrusion.
The BondTech BMG is a dual drive, geared extruder. The dual drive increases the contact with the filament, improving gripping and reducing slipping. The teeth pattern is designed such as to provide enough grip to avoid shearing the filament while maintaining the filament shape. The BondTech BMG uses an internal gear ratio of 3:1 which significantly increases the extrusion force and the resolution, two excellent factors when looking for great print quality.
The 3:1 gear ratio and the dual drive of the BondTech BMG ensures trouble free and accurate extrusion + ultra accurate retractions.
The BondTech BMG costs around 90 EUR. You can find clones around 25 euros but of course they don’t have the quality of the Bondtech.
Why the E3D V6?
The E3D V6 costs around 60 euros. For the sake of this video, I also ordered a clone on Amazon for about 10 euros… At first glance, both look pretty similar. The main distinguishing difference between the 2 is the heatbreak. In the clone, the manufacturer decided to use a teflon tube in the hot zone. This completely defeats the purpose of the V6.
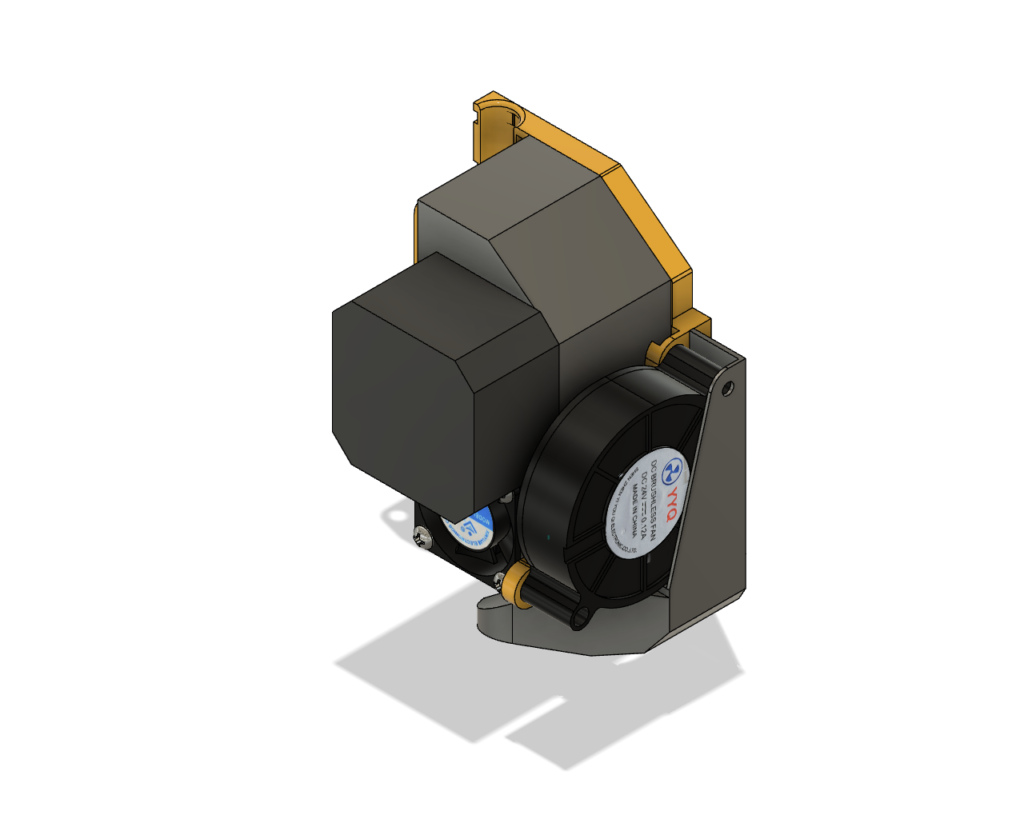
OK, back to our setup… Connecting the E3D V6 hotend directly to the output of the BMG extruder keeps the filament path as short and constrained as possible. The bowden tube is only 37 mm long! This leads to a more responsive extruder with cleaner starts and stops and, by extension, better print quality.
BondTech BMG E3D V6 extrusion tests
In order to compare objectively the extrusion performance between the BMG E3D V6 Direct Drive and the stock extruder/hotend on my Ender 3 Pro, I do some extrusion tests.
I extrude 100 mm of filament at various speeds and for each speed, I measure how much filament is actually extruded with a ruler. Ideally we would like the printer to extrude exactly the length requested regardless of the print speed. Let see what we get…
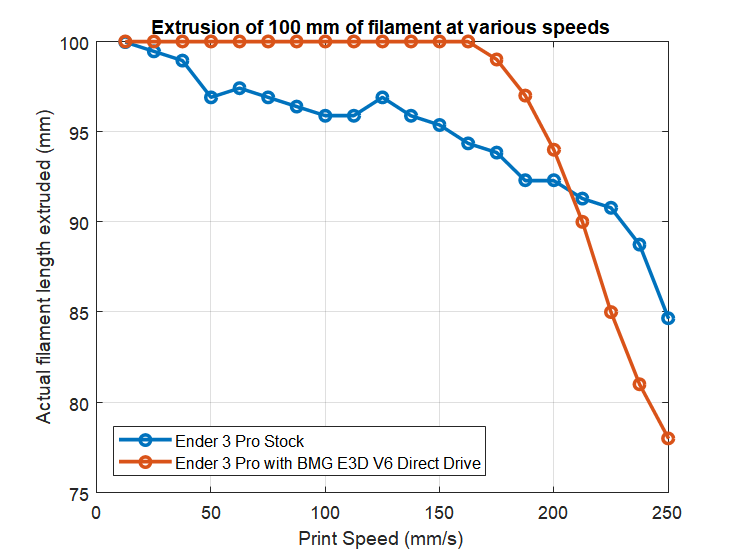
The blue curve shows the Ender 3 Pro stock extruder and hotend. It can be seen that the extrusion is influenced by the print speed: The faster we print, the less extrusion. This is because increasing print speeds increases the pressure in the nozzle. The extruder has to push against this pressure. Without sufficient motor torque and a firm grip, filament slippage occurs and the printer extrudes less than we requested.
The red curve shows the BMG E3D V6 Direct Drive. As expected, the higher torque, higher resolution and better filament grip of the BMG E3D V6 ensures ultra accurate extrusion between 0 and 175 mm/s! The curve is perfectly flat. These are actual measurements!
It is only above 175 mm/s that the extrusion starts to degrade. 175 mm/s corresponds to a volumetric feed rate of 14 mm3/s . This is very close from the 15 mm3/s max volumetric flow rate advertised by E3D for the V6.
BondTech BMG Retraction settings
The retractions also benefit significantly from the accuracy of BMG E3D V6 direct drive. I get perfect retractions using a retraction distance of 3 mm and a retraction speed of 25 mm/s.
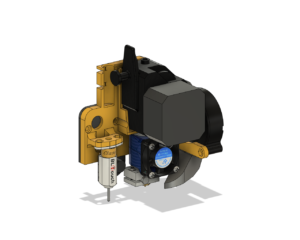
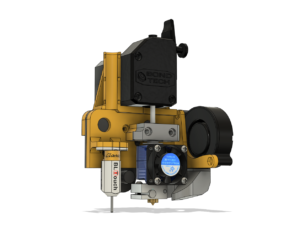
How to install a BMG E3D V6 Direct-Drive on your Ender 3 (Pro/V2) or CR10?
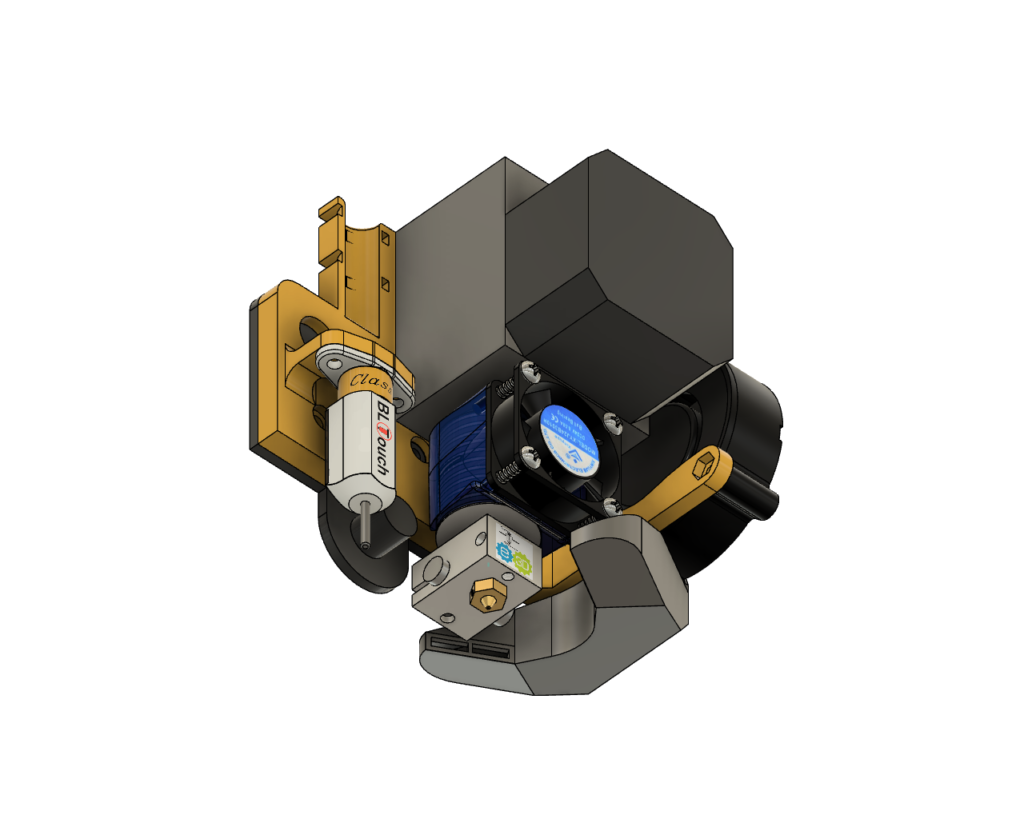
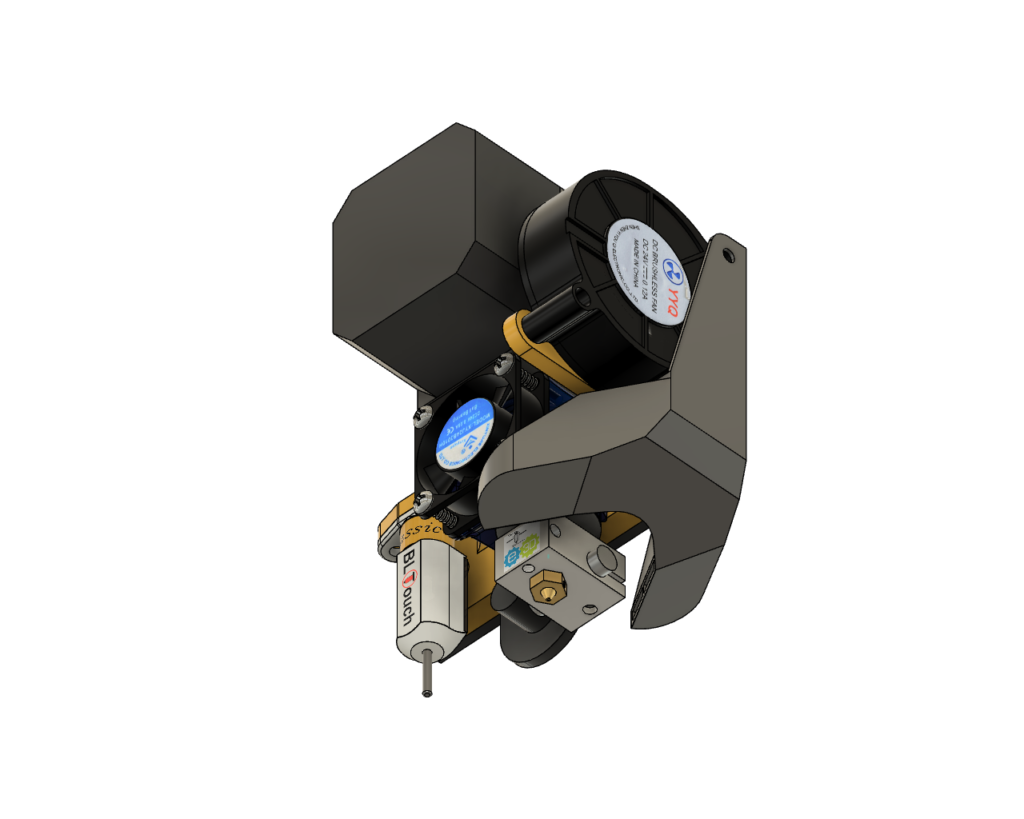
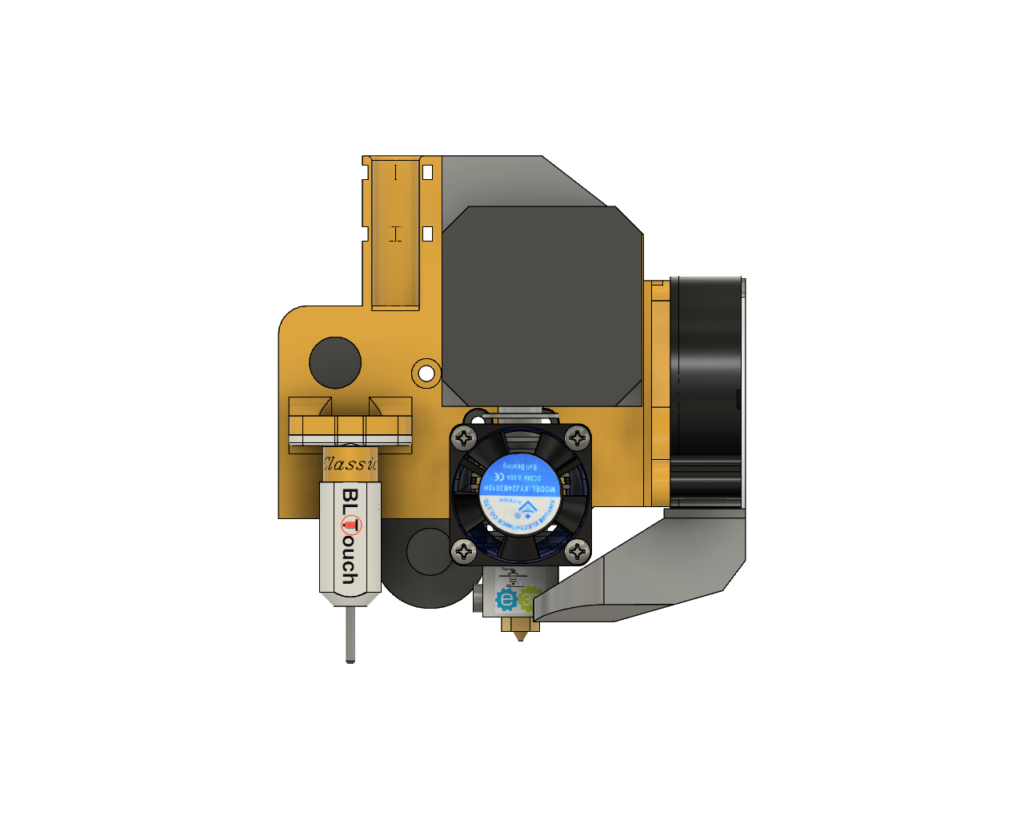
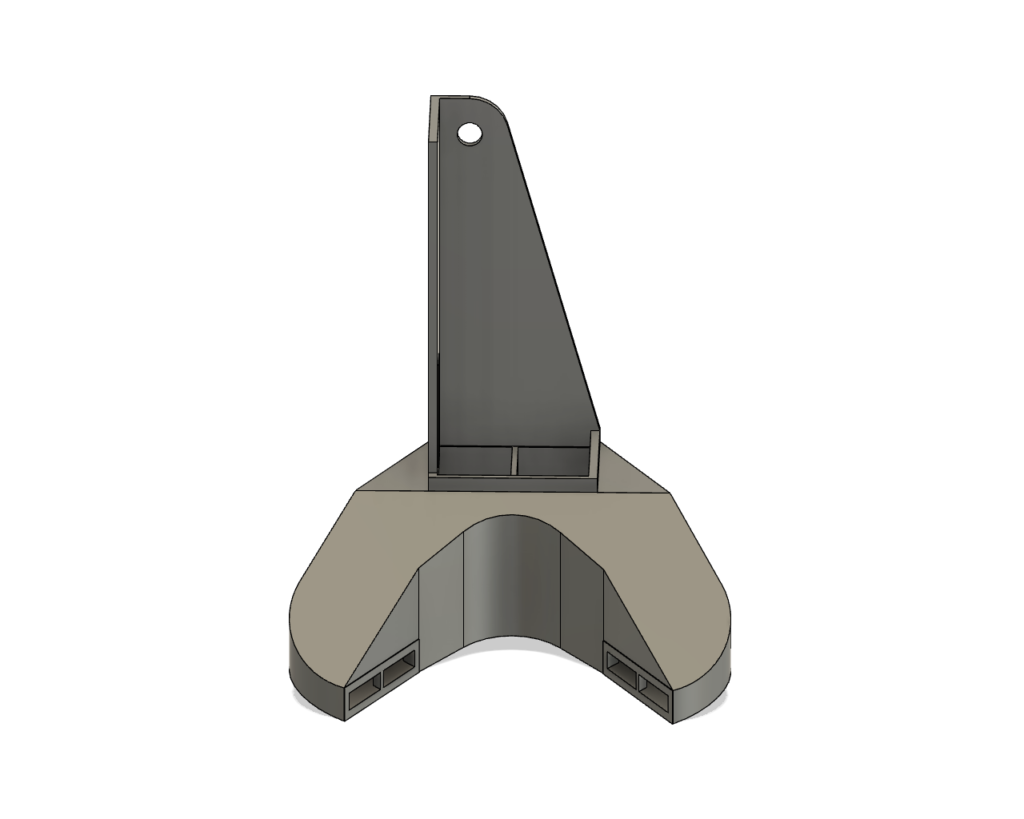
In order to install this upgrade on my Ender 3 Pro, I designed a custom 3d printed mount.


BMG E3D V6 firmware for the Ender 3
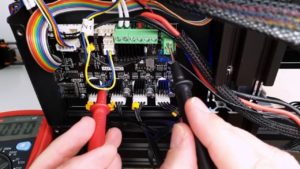
In addition, this upgrade requires some firmware changes.
Download the Marlin firmware for this configuration on GitHub
Download the Klipper firmware for this configuration on GitHub
Firmware changes required (Marlin 2.x)
- In Configuration.h:
To account for the shift of the hotend position:
#define X_BED_SIZE 235 -> #define X_BED_SIZE 230
#define Y_BED_SIZE 235 -> #define Y_BED_SIZE 230
//#define MANUAL_Y_HOME_POS 0 -> #define MANUAL_Y_HOME_POS -12
For the E3D V6 hotend (Genuine):
#define TEMP_SENSOR_0 1 -> #define TEMP_SENSOR_0 5
#define HEATER_0_MAXTEMP 275 -> #define HEATER_0_MAXTEMP 300
For the BondTech BMG:
#define DEFAULT_AXIS_STEPS_PER_UNIT { 80, 80, 400, 93 } -> #define DEFAULT_AXIS_STEPS_PER_UNIT { 80, 80, 400, 415 }For the BLTouch (Connected to the 5 pins connector of the Creality V4.2.7 board, not to the Z min stop pins):
#define Z_MIN_PROBE_USES_Z_MIN_ENDSTOP_PIN -> //#define Z_MIN_PROBE_USES_Z_MIN_ENDSTOP_PIN

//#define USE_PROBE_FOR_Z_HOMING -> #define USE_PROBE_FOR_Z_HOMING

//#define BLTOUCH -> #define BLTOUCH
#define NOZZLE_TO_PROBE_OFFSET { 10, 10, 0 } -> #define NOZZLE_TO_PROBE_OFFSET { -36.0, 0, 0 }
#define PROBING_MARGIN 10 -> #define PROBING_MARGIN 36
#define Z_PROBE_LOW_POINT -2 -> #define Z_PROBE_LOW_POINT -10
#define MIN_SOFTWARE_ENDSTOP_Z -> //  #define MIN_SOFTWARE_ENDSTOP_Z
//#define AUTO_BED_LEVELING_BILINEAR -> #define AUTO_BED_LEVELING_BILINEAR
//#define Z_SAFE_HOMING -> #define Z_SAFE_HOMING- In Configuration_adv.h
//#define BABYSTEP_ZPROBE_OFFSET -> #define BABYSTEP_ZPROBE_OFFSETConclusion
I have been printing with the BMG E3D V6 Direct Drive for a couple of months now… This is by far the best upgrade I have done to my Ender 3 when it comes to print quality and reliability. This upgrade doesn’t come cheap though, it almost doubles the price of the printer! But it really pushes the Ender 3 to the next level. This upgrade also opens the door to new possibilities like printing ABS for example or printing much faster.